
You are not logged in
log in >>
Resources
Turn your Arduino into an Internet-of-Things solution
Get started by following these steps:- Signup to feoWeb (here >>), and log in
-
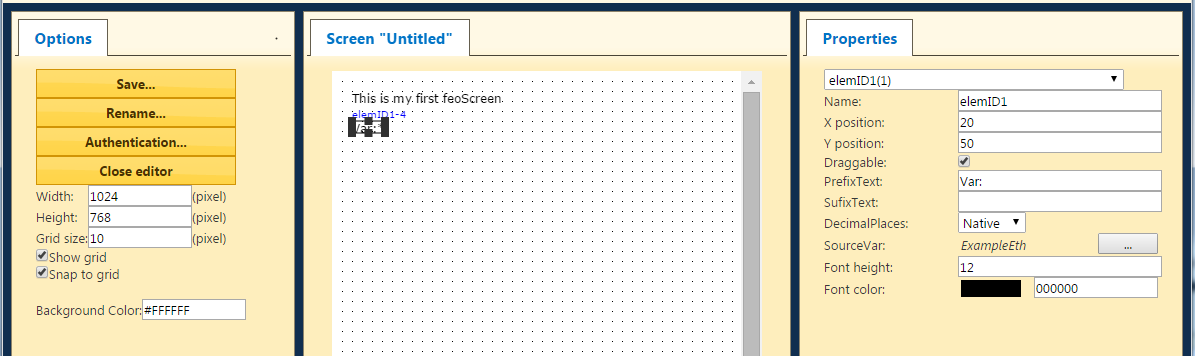
Create your first feoScreen:
- Login, go to the "My Projects"/"feoScreens" section, click "New"
- Place a "Label" element and set its property "Text" to some meaningful text for example "This is my first feoScreen"
- Place a "VariableBox" element and at its "SourceVar" Property click the button "..." navigate to the variable "Arduino1_loopCounter" - this is the variable that is by default added to your account. Select it. (In order to create Variables of your own, just use the "Add" button, and give them some name of your liking. This guide is written with the assumption that the "Arduino1_loopCounter" variable will be placed to your feoScreen)
-
Finally your FeoScreen should look somehow like this:
-
Setup your Arduino:
-
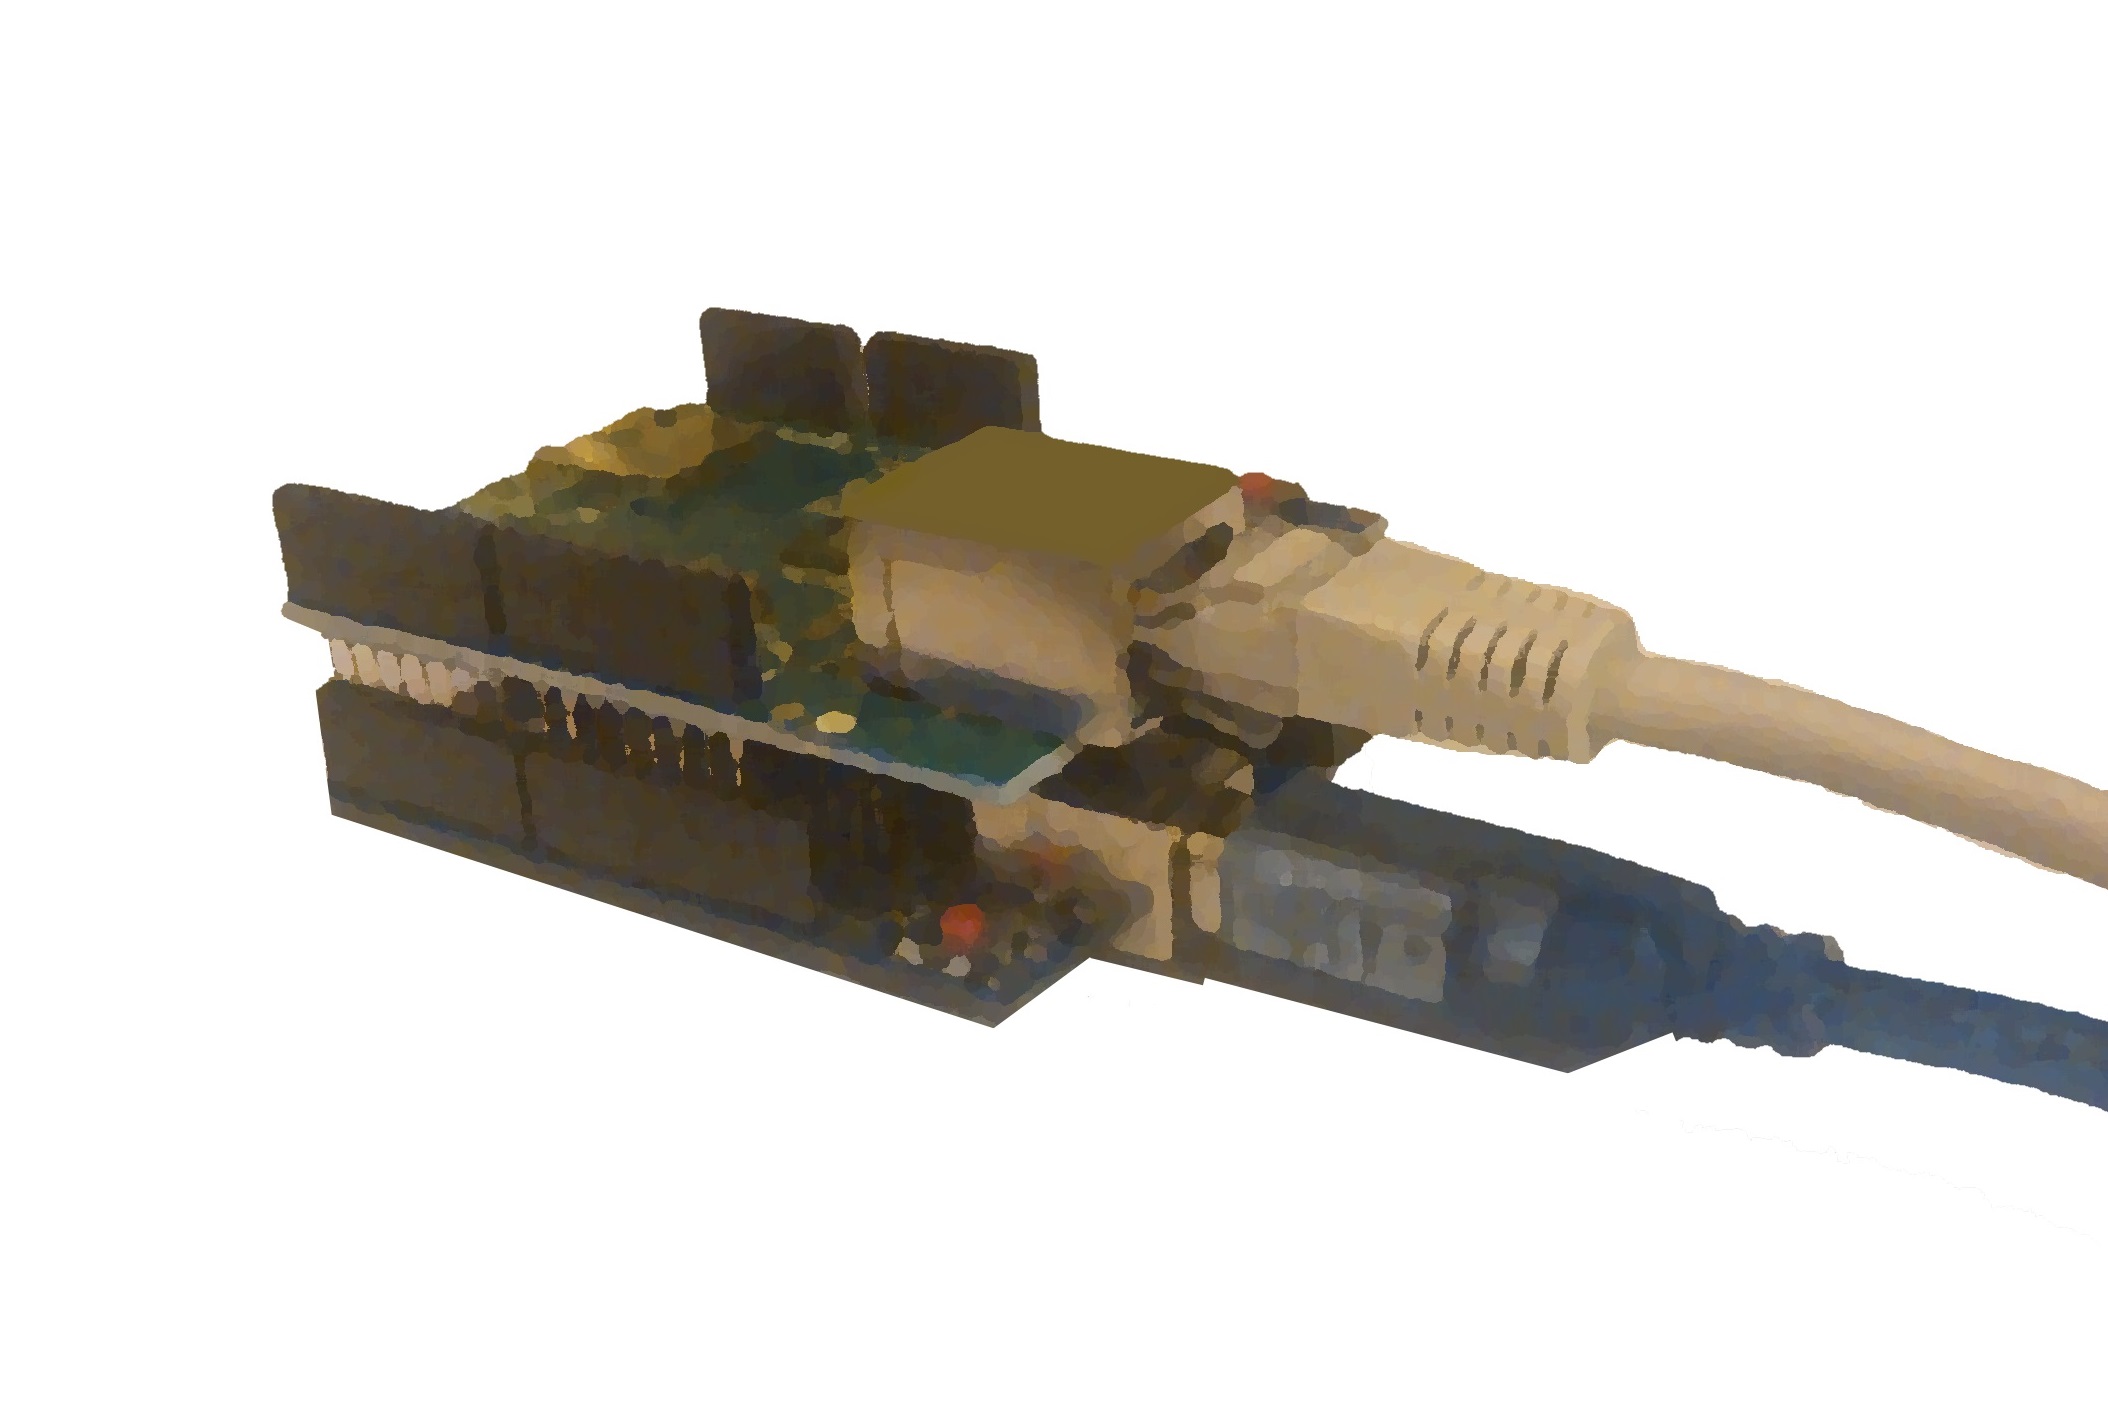
Connect your Arduino/Genuino to your Network in order to have Internet access, and to your PC so you can program it
-
Download the feoWeb Arduino ETH library (here >>), create a subfolder "feoWeb" in
the Arduino libraries folder (on Windows typically here: c:\Program Files (x86)\Arduino\lib\) and place it there:
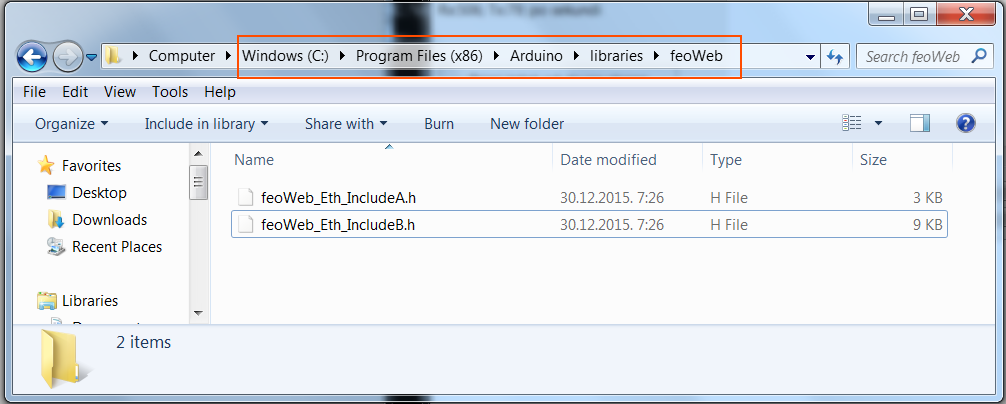
-
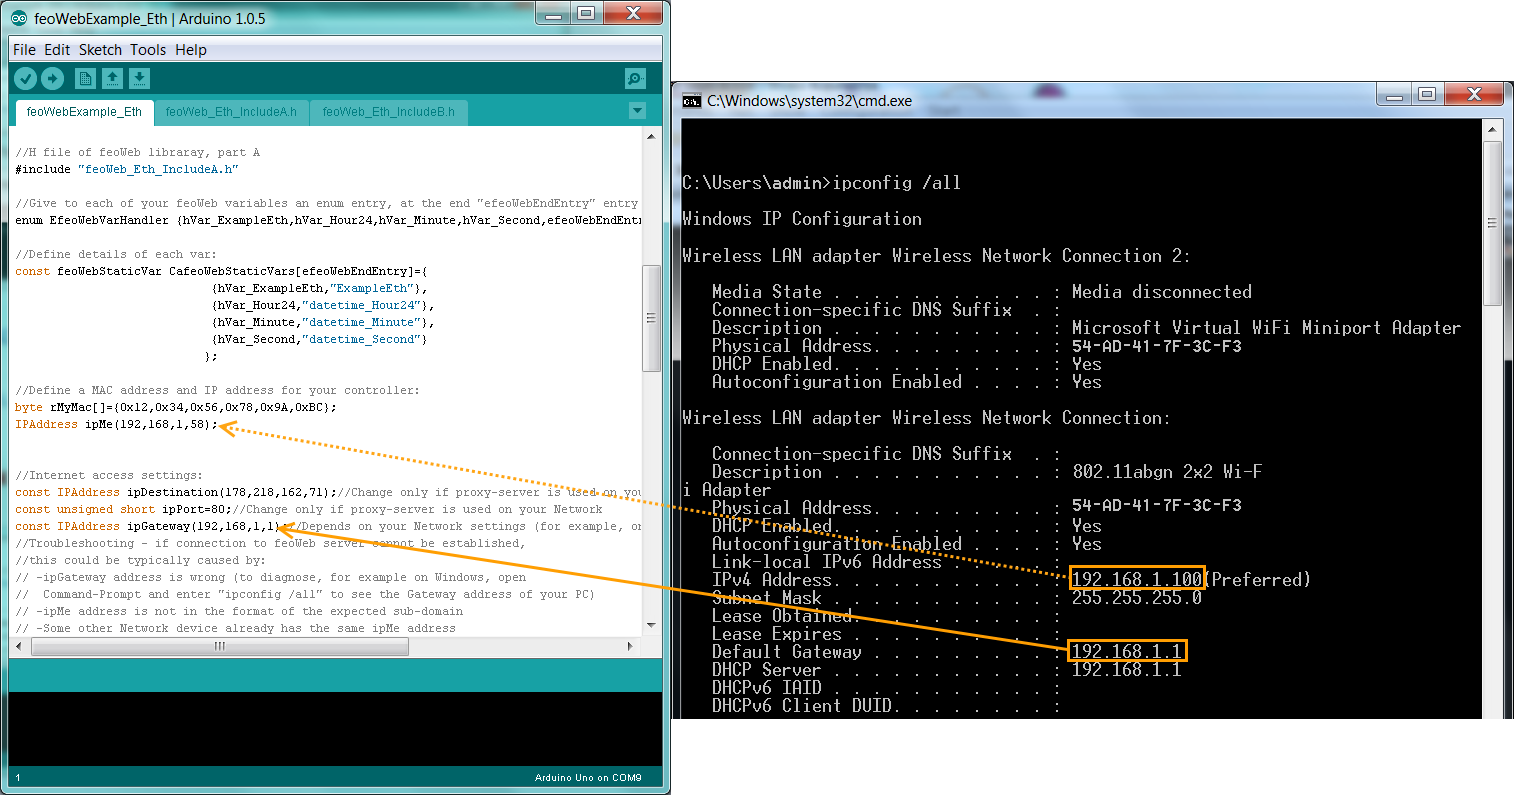
Download the feoWeb Arduino Ethernet example (here >>), unpack
it into an appropriate folder. Double click the .ino file and go to
the place where the "ipMe" and "ipGateway" values are
defined. Change them to appropriate values
so that your Arduino can access the internet via your Network. The Gateway
IP address can be typically found out in Windows Command Prompt, using
the "ipconfig /all" command. For the ipMe address put some
value that is similar (but unique) to IP addresses of other
participants on your network:
-
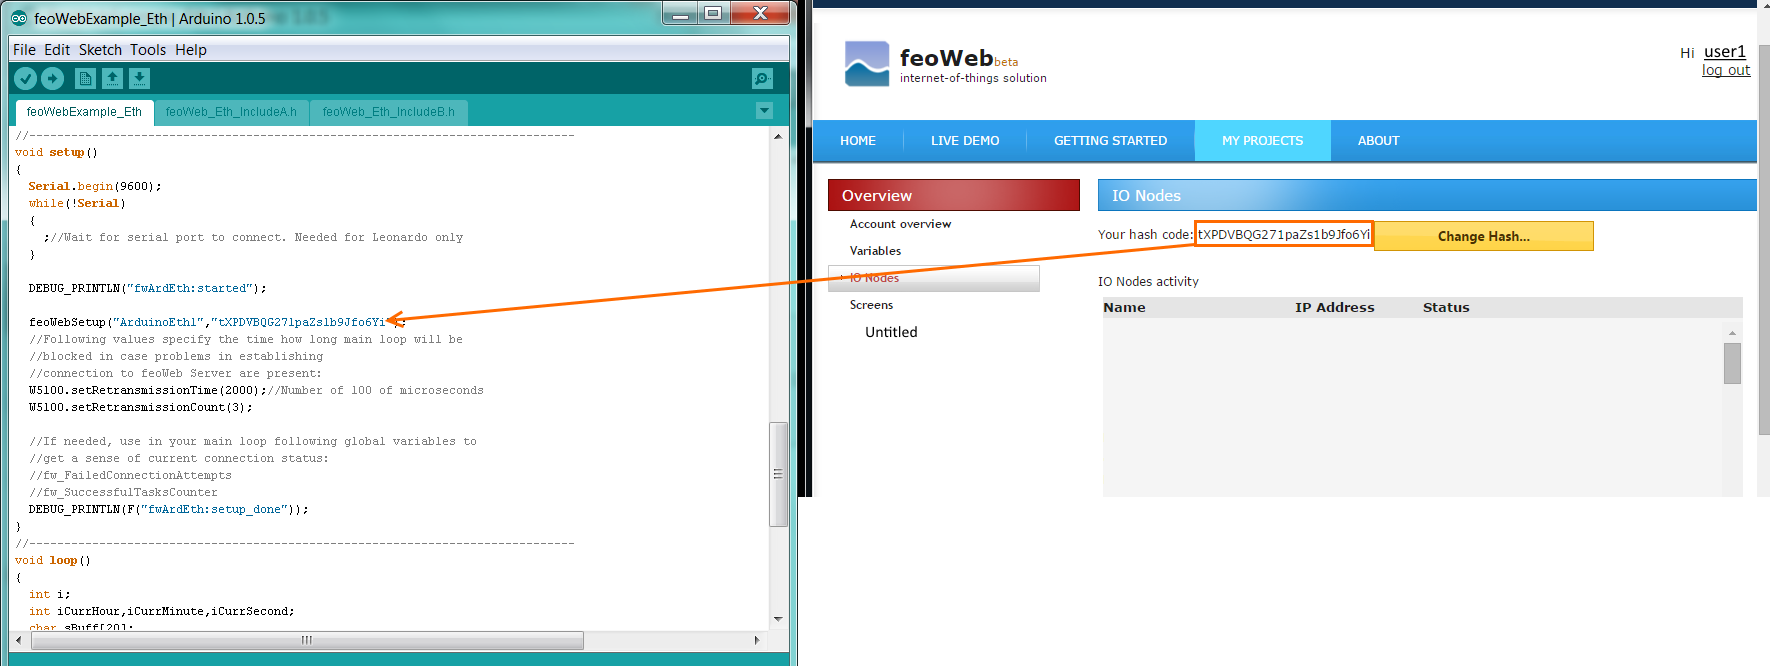
Set the values related to your feoWeb account: First set your hash code, you can find it in the "IO Nodes" section when
you log in, then give the Arduino some name for example "Arduino1":
-
Connect your Arduino/Genuino to your Network in order to have Internet access, and to your PC so you can program it
-
These changes should be enough for a basic test -> compile and transmit the .ino sketch into your Arduino, and if everything is connected and
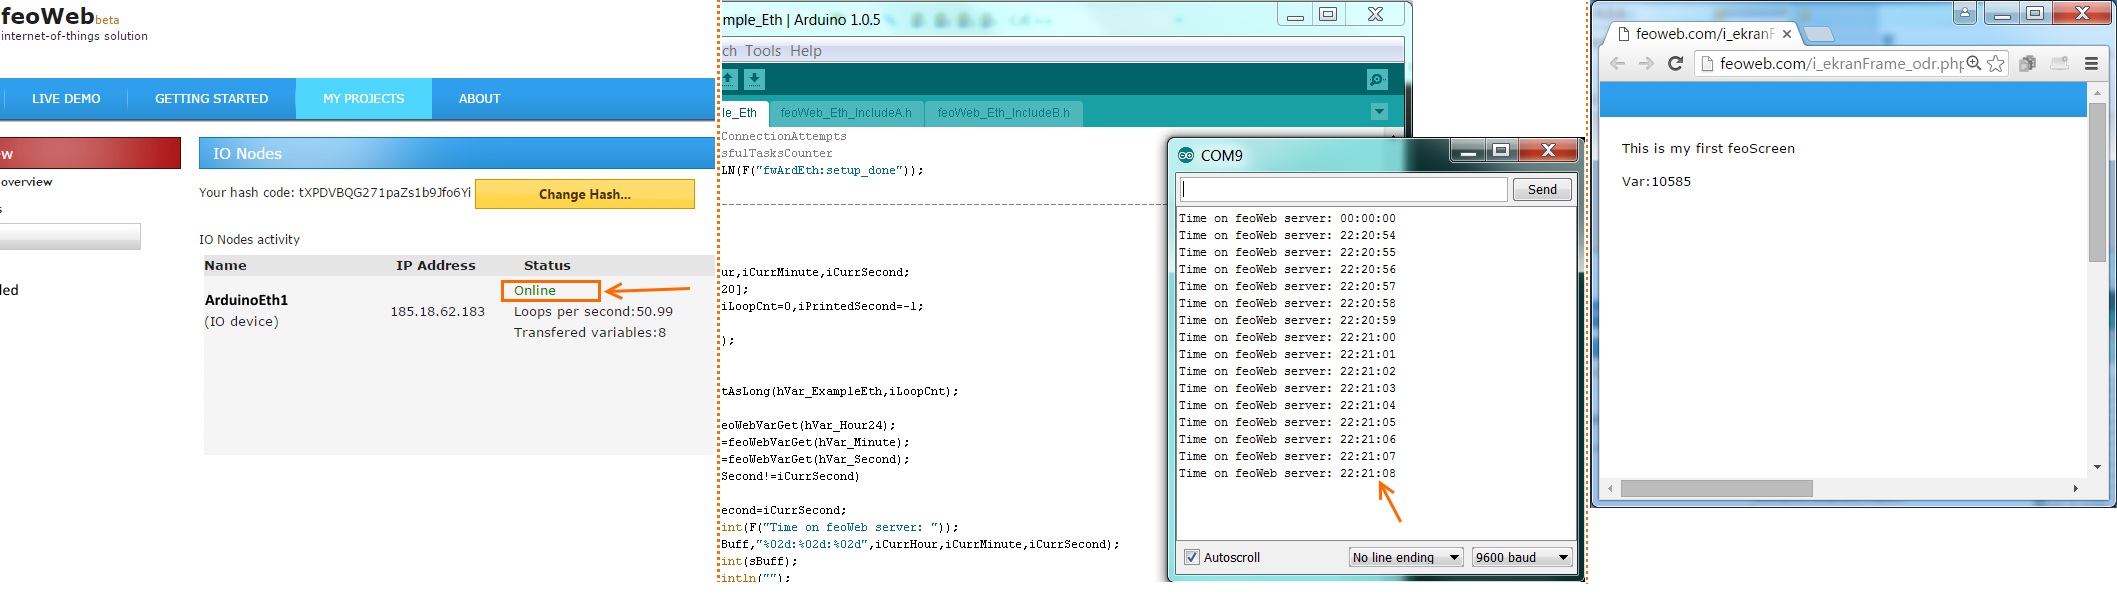
configured well, as soon as your Arduino starts up, you should see:
- In the "IO Nodes" overview an Arduino being on line,
- In the "Variables" overview you should see the Variable "Arduino1_loopCounter" counting up
-
In the Arduino's serial Monitor you should see the Information of current Time that the Arduino is getting from feoWeb server
-
Activity in the feoScreen that you created earlier in scope of this guide:
-
That's it; Now expand and edit the example to your liking
Don't forget to try out all other useful elements you can place on feoScreens:- Graphcharts: to log variable values through time
- Bargraphs: visual indication
- Imegalist: control from Arduino which image should be shown by changing an integer number